Step 7: The Cheesy Topping (Optional but Recommended!)
- Remove the loaf from the oven.
- Sprinkle the remaining $\frac{1}{4}$ cup of shredded cheddar cheese evenly over the top of the hot bread.
- Return the loaf to the oven for an additional 3–5 minutes, or until the cheese is melted and bubbling. Keep a close eye on it to prevent burning.
Step 8: Cool and Slice
- Transfer the loaf to a wire rack to cool completely in the pan (about 1-2 hours).
- Once cooled, use the parchment paper overhang to lift the bread from the pan.
- Slice and enjoy!
💡 Baker’s Notes & Pro Tips
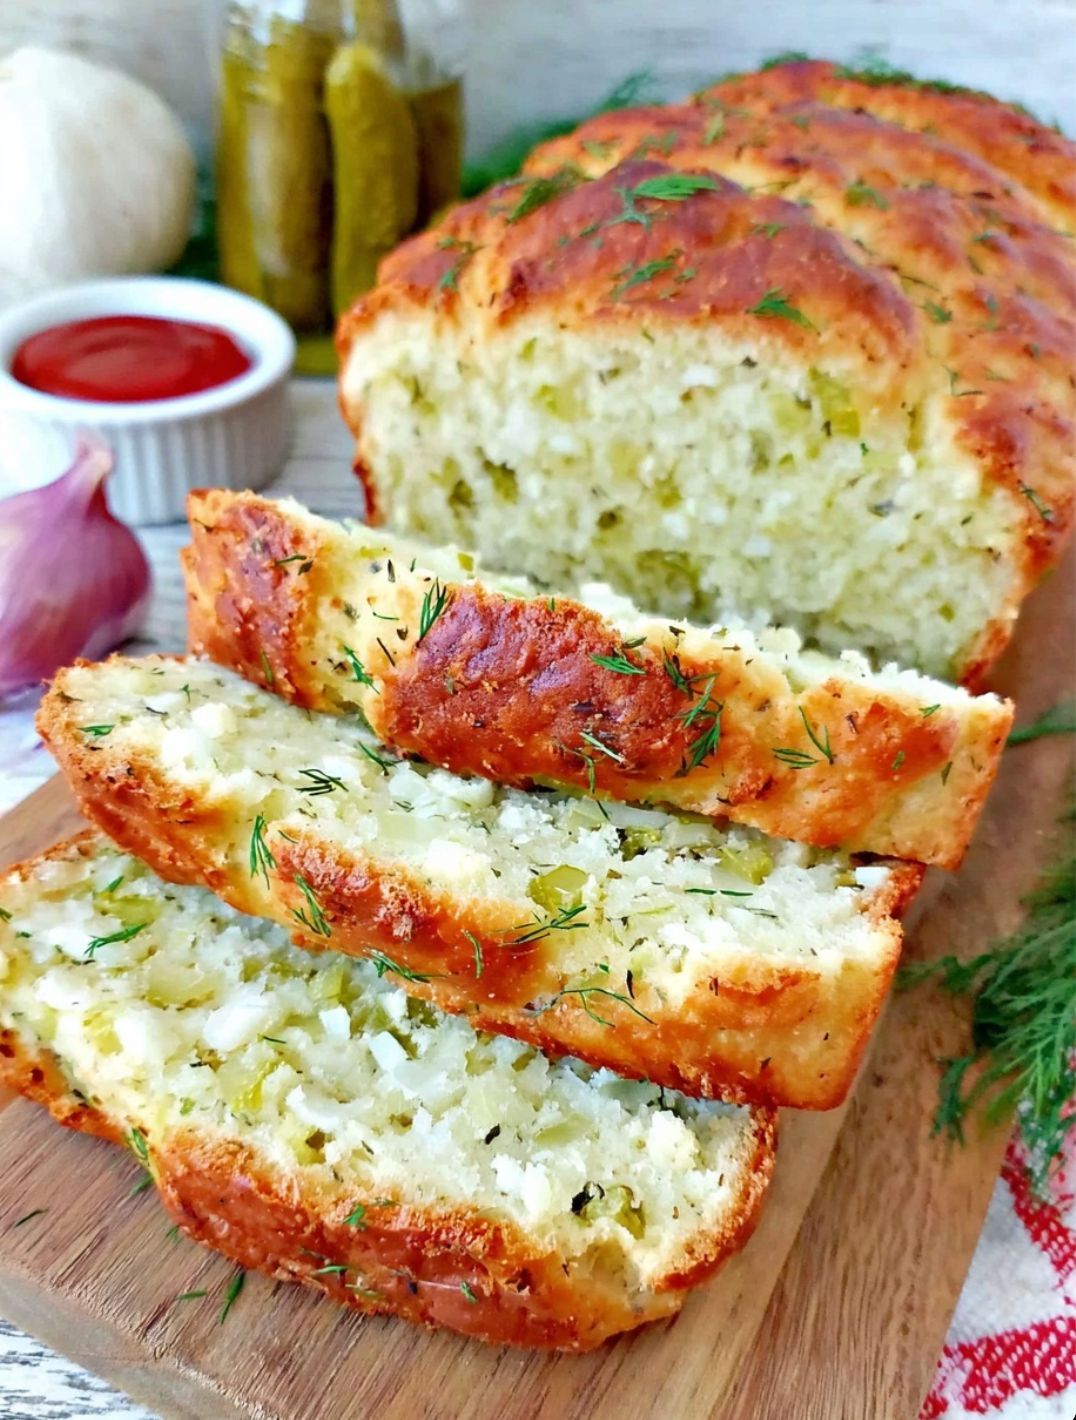
- The Power of Pickle Juice: Don't skip the pickle juice! It adds a critical layer of tanginess and moisture that is essential to the "dill pickle" flavor.
- Choose Crunchy Pickles: Use a firm, crunchy dill pickle variety. Softer pickles tend to "melt" into the dough and lose their distinct texture.
- Pat Them Dry: Always pat the chopped pickles dry with a paper towel. Excess liquid can throw off the wet-to-dry ingredient ratio, leading to a denser, gummy bread.
- Storage: Once cooled, store the bread tightly wrapped in parchment paper and then plastic wrap, or in an airtight container at room temperature for up to 3 days. It can also be frozen for up to 3 months—just be sure to wrap it well!
🍽️ Serving Suggestions
This savory quick bread is incredibly versatile:
- As a Side: Serve it alongside a hearty bowl of tomato soup, chili, or a creamy potato salad.
- Grilled Cheese Upgrade: Use thick slices of this bread to make an unforgettable grilled cheese sandwich.
- Appetizer: Toast slices lightly and top with cream cheese, smoked salmon, or a dollop of egg salad.
- Just as it is: Enjoy a warm slice spread with a bit of butter or a savory chive cream cheese.
Tell Us!
Have you ever baked with pickles before? Share your experience in the comments below, and let us know what you'd serve this Cheesy Dill Pickle Bread with!
For Complete Cooking STEPS Please Head On Over To Next Page Or Open button (>) and don’t forget to SHARE with your Facebook friends.