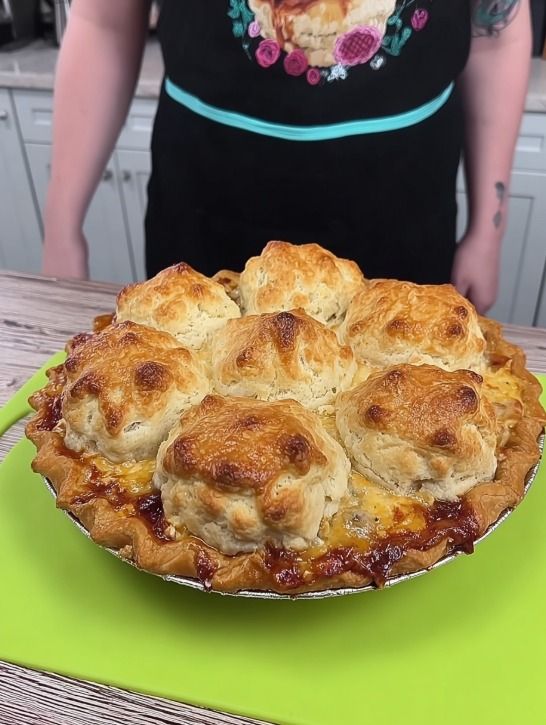
🍽️ Recipe: Easy Chicken Pot Pie with Biscuit Topping
| Prep Time | Cook Time | Total Time | Yields |
| 15 minutes | 35 minutes | 50 minutes | 6 servings |
Ingredients
For the Cozy Filling
- 2 Tablespoons unsalted butter
- 1 small yellow onion, diced
- 2 medium carrots, peeled and diced
- 2 stalks celery, diced
- 2 cloves garlic, minced
- 1/4 cup all-purpose flour
- 2 cups low-sodium chicken broth
- 1 cup half-and-half (or whole milk)
- 2 cups cooked chicken, shredded or cubed (Rotisserie chicken works great!)
- 1 cup frozen peas and corn mix, thawed
- 1 teaspoon dried thyme
- 1/2 teaspoon salt, plus more to taste
- 1/4 teaspoon black pepper, plus more to taste
For the Easy Biscuit Topping
- 2 cups biscuit/baking mix (like Bisquick) OR use a can of refrigerated biscuits for an even quicker shortcut!
- 2/3 cup milk (whole or 2%)
- Optional: 1 Tablespoon melted butter for brushing, and a sprinkle of flaky sea salt or dried herbs.
Instructions
1. Prepare the Filling
- Preheat Oven & Prep Dish: Preheat your oven to 400°F (200°C). Lightly grease a deep-dish pie plate (9-inch) or an oven-safe skillet (10-12 inch cast iron works well).
- Sauté Aromatics: Melt the butter in a large skillet (or the oven-safe skillet you plan to use for baking) over medium heat. Add the diced onion, carrots, and celery. Sauté for 5-7 minutes until the vegetables begin to soften. Stir in the minced garlic and cook for 1 minute more until fragrant.
- Make the Roux: Sprinkle the flour over the vegetables and stir continuously for about 1 minute. This cooks out the raw flour taste.
- Create the Sauce: Slowly whisk in the chicken broth, making sure to scrape up any browned bits on the bottom of the pan. Bring the mixture to a simmer.
- Simmer and Thicken: Once simmering, stir in the half-and-half (or milk), thyme, salt, and pepper. Continue to simmer, stirring occasionally, for 2-3 minutes until the sauce has thickened to a gravy-like consistency.
- Combine Ingredients: Remove the skillet from the heat. Stir in the cooked chicken and the thawed peas and corn. Taste the filling and adjust the seasoning (salt, pepper, or thyme) as needed.
- Transfer (if needed): If you used a skillet that is not oven-safe, pour the filling into your prepared pie dish or casserole dish.
2. Make the Biscuit Topping
- Mix Topping: In a medium bowl, combine the biscuit/baking mix and the milk. Stir just until combined. Do not overmix—a few lumps are okay. If using refrigerated biscuits, simply open the can and prepare them as directed on the package (usually slicing or separating).
- Top the Pie: Drop the biscuit dough by spoonfuls (or place the refrigerated biscuits) evenly over the top of the chicken mixture. It's okay if there are small gaps; they will spread as they bake.
3. Bake and Serve
- Bake: Place the pie in the preheated oven. Bake for 20–25 minutes (or according to package directions if using refrigerated biscuits).
- Check for Doneness: The pot pie is ready when the biscuit topping is puffed, golden brown, and cooked through, and the filling is hot and bubbly around the edges.
- Finish (Optional): For extra shine and flavor, brush the tops of the hot biscuits with the 1 tablespoon of melted butter and sprinkle with flaky sea salt or a pinch of fresh thyme.
- Cool and Serve: Let the pot pie cool for about 5 minutes before serving. This allows the filling to set slightly, making it easier to serve.
💡 Tips for the Coziest Pot Pie
- Rotisserie Chicken is Key: This is the ultimate time-saver! A store-bought rotisserie chicken means the chicken is already perfectly cooked and seasoned.
- Customize Your Veggies: Don't love peas and corn? Feel free to swap them out for cooked potato cubes, sliced mushrooms, green beans, or even a handful of chopped fresh spinach.
- Biscuit Perfection: If your filling is very hot, the bottom of the biscuits touching the filling might be a little moist—this is normal! If you prefer a crispier all-around biscuit, you can bake the biscuits separately on a baking sheet and simply place them on top of the bubbly filling right before serving.
- Make Ahead: The filling can be made up to 2 days in advance and stored in the refrigerator. When ready to bake, heat the filling in the dish until warmed through, then proceed with the biscuit topping and bake.
This comforting dish is a complete meal on its own, but it pairs wonderfully with a simple side salad dressed with a light vinaigrette to cut through the richness. Enjoy!
For Complete Cooking STEPS Please Head On Over To Next Page Or Open button (>) and don’t forget to SHARE with your Facebook friends.